How to Build a Backpacking Sleep System
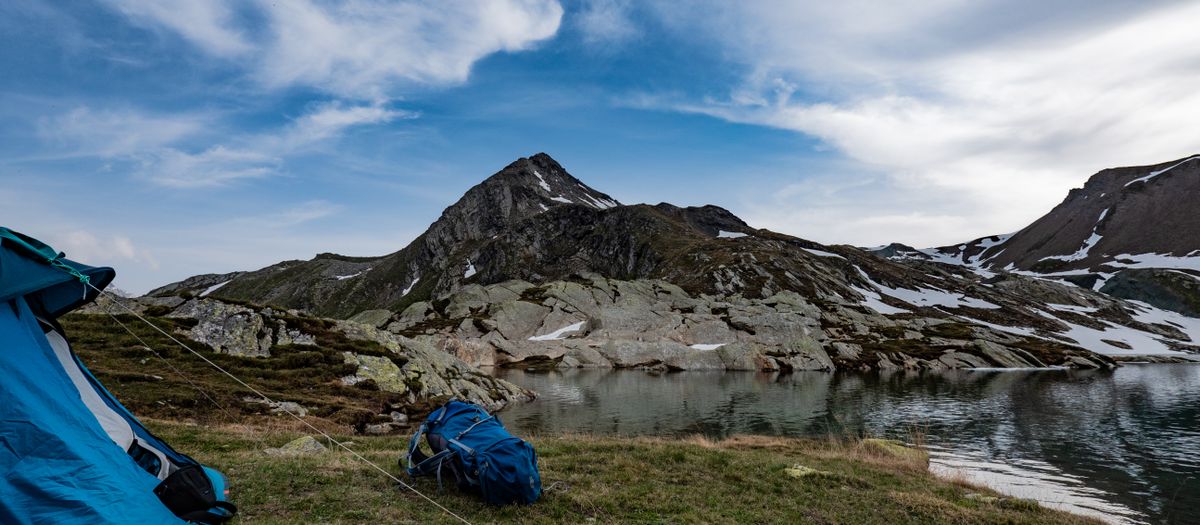
A good night's sleep on the trail comes down to one idea most first-timers miss: warmth is the bag AND the pad, working as a single system. Get the temperature rating and the R-value matched to your overnight low and you sleep warm carrying the least weight. Get them out of balance and you either freeze or haul gear you didn't need. This guide walks every decision in the order it actually matters — the system insight first, then the bag rating, the pad R-value, fill type, mummy vs quilt, and the rest of the cart.
A note on how I write here. I'm Theo, the founder of Warmth to Weight, and I do my cold-shoulder-season backpacking out of Bend, Oregon, across the Cascades. The opinions here come from real time on the trail; the product numbers come from manufacturer specs and the lab standards (ISO 23537 for bags, ASTM F3340 for pads), not from any testing I'm pretending to have run. I'll always keep those two things separate. What follows is the whole buying chain in the order it actually matters — the bag-and-pad system idea first, then the bag rating, the pad R-value, fill type, mummy versus quilt, fill power, packed size, the rest of the cart, and the rookie mistakes I want you to skip.
Why warmth is the bag AND the pad
If you remember one thing from this whole guide, make it this: a warm bag on a cold pad still sleeps cold. When you lie down, your body weight crushes the insulation underneath you flat, so the bag does almost nothing to stop heat draining into the ground. The pad's R-value is what blocks that conductive heat loss. The two specs — the bag's ISO Comfort rating and the pad's R-value — have to be matched to the same overnight low, or the weaker one decides how your night goes.
Here is the physics in plain English. You lose body heat three ways overnight: it radiates off you, it convects away in moving air, and it conducts straight into whatever you are touching. The bag's loft — all that trapped air in the down or synthetic fill — handles the radiating and convecting heat well, which is why a bag feels warm when you hold it. But the moment you lie on it, the fill underneath you squashes flat to almost nothing and stops trapping air. Now the cold ground is in near-direct contact with your back, pulling heat out of you by conduction faster than any amount of top-side loft can replace. The ground, not the air, is the thief on most cold nights. The pad is the only thing standing between your back and that heat sink, and its R-value is the measure of how well it does the job.
That is why a backpacking sleep system is exactly that — a system, two specs that have to be read together rather than one headline bag rating bought in isolation. People naturally fixate on the bag because it is the big, warm, obvious purchase, and they treat the pad as an afterthought bought on price. It is the wrong instinct, and it is the single most common reason first-timers have a miserable night despite spending real money on a "warm" bag. Whenever you read a bag's temperature rating in this guide, picture the matching pad underneath it; one number without the other tells you almost nothing about how you will actually sleep.
The fastest way to get this right is the sleep-system matcher: enter your overnight low and sleeper type and it returns the bag ISO Comfort rating AND the minimum pad R-value you need, as a paired system. It exists specifically to stop the warm-bag-cold-pad mismatch before you buy.
Reading ISO 23537 Comfort vs Limit ratings
Sleeping bag temperature ratings come from a lab standard, ISO 23537, which gives two figures. The Comfort rating is the lowest temperature at which a cold sleeper stays comfortable; the Limit rating is the lowest at which a warm sleeper avoids shivering. Manufacturers love to headline the Limit number because it sounds warmer. Buy to the Comfort rating — and if you sleep cold, or you're shopping for someone who does, that goes double. Both are lab figures, and real-world warmth varies with the sleeper, the pad, the shelter and the conditions.
It helps to know how those numbers are produced, because it explains why the Limit rating misleads so many first-timers. The standard puts a heated, sensor-covered mannequin in the bag, dresses it in a defined base layer, lays it on a reference pad, and measures how much insulation the bag provides. From that it calculates the Comfort figure (modelled on a "standard woman", who tends to sleep colder) and the Limit figure (modelled on a "standard man" right at the edge of shivering). So the Limit rating is not a comfortable temperature — it is the point at which a warm sleeper is curled up and just barely not shivering through the night. That is survival-of-the-evening, not a good sleep. When a box headlines a bag as "rated to 20°F", that is almost always the Limit figure, and the temperature at which a typical person actually sleeps comfortably is several degrees warmer.
So the practical rule is simple: shop by the Comfort rating, and pick a bag whose Comfort number sits at or below the coldest overnight low you realistically expect, with a little margin on top for exposed sites and a bad-weather surprise. Cold sleepers, anyone shopping for a partner who is always cold, and most women should treat the Comfort figure as the only number that matters and ignore the Limit entirely. You can always vent a bag that runs a touch warm; you cannot add warmth to a bag that is already at its limit. And because these are lab figures, real-world warmth still varies with your metabolism, what you ate, how hydrated you are, the pad beneath you, the shelter around you and the wind — a rating is a guide for comparing bags, never a promise about a particular night.
ASTM F3340 R-value tiers by season
Sleeping pad warmth is measured by R-value under the ASTM F3340 standard — higher means more resistance to heat loss into the ground. As a working guide: R-2 and under suits warm summer nights, R-2 to R-4 covers most 3-season trips, and R-4.5 and up is for cold-weather and winter ground. R-values add when you stack pads, which is how a foam pad under an air pad turns a 3-season setup into a winter one.
Before ASTM F3340 arrived, every brand measured R-value its own way and the numbers were not comparable across makers — one company's "R-4" might out-insulate another's. The standard fixed that by defining a single test (a pad squeezed between a hot plate and a cold plate, measuring how much heat gets through), so today an R-value from one brand means the same thing as the next. That makes R-value the one pad spec you can actually trust to compare like for like, which is exactly why it sits at the centre of how we size pads here. Treat the season tiers above as the spine of the decision: pick the tier that matches the coldest ground you will sleep on, not the average night.
The stacking trick is worth spelling out because it is genuinely useful and cheap. R-values are additive, so a thin closed-cell foam pad (often around R-2) laid under your main air pad simply adds its number to the air pad's — turning, say, an R-3 air pad into an R-5 winter setup for the cost of a foam pad you can also use as a sit pad and a tear-proof backup. It is how a lot of experienced winter backpackers build their cold-weather warmth without buying a single dedicated four-season pad. To take the guesswork out of which tier your specific trip needs, run your overnight low through the sleep-system matcher, which returns the minimum R-value and the matching bag Comfort rating together.
Down vs synthetic fill
Down gives the most warmth for the least weight and pack size, and lasts for years if you keep it dry — the workhorse of ultralight kits. Its weakness is moisture: wet down loses loft and stops insulating. Synthetic is heavier and bulkier for the same warmth, but it keeps insulating when damp and costs less, which makes it the safer pick for wet, condensation-prone shoulder-season trips. I carry a down quilt for dry 3-season trips and a synthetic bag for wet ones — it's a trade-off, not a winner.
Down is the soft under-plumage of ducks and geese, and it insulates by trapping a huge volume of air in a tiny, light cluster — which is why nothing beats it on warmth for the weight. Properly cared for, a down bag holds its loft for ten years or more, far outlasting synthetic. The catch is the one you have to respect: when down gets soaked it clumps, the loft collapses, and it stops insulating until it dries, which can take an inconvenient day or two in the field. Water-resistant (hydrophobic) down treatments and a careful dry-bag habit narrow that gap a lot, but they do not erase it. If your trips are mostly dry, or you are disciplined about keeping the bag dry, down is the obvious pick.
Synthetic fill is made of fine polyester fibres engineered to mimic down's loft. It is heavier and bulkier for the same warmth and it loses loft faster over the years, but it has two real advantages: it keeps a useful amount of its insulation even when damp, and it dries quickly, so a soaking is an inconvenience rather than a cold-night emergency. It also costs noticeably less, which makes it a smart first bag. The honest decision comes down to how wet your trips get. Persistent rain, heavy overnight condensation, river crossings, snow-melt shoulder seasons — that is synthetic territory. Dry alpine and high-desert nights where every gram counts — that is down's home ground. There is no universal winner, which is exactly why I own one of each.
Fill power: what the down number means
If you are buying a down bag you will run into fill power — a number like 650, 800 or 900. It measures the quality of the down, not how much is in the bag: specifically, how many cubic inches one ounce of that down lofts up to fill. Higher fill power means each ounce traps more air, so a higher-fill-power bag reaches the same warmth with less down by weight, and packs down smaller. An 800-fill bag and a 650-fill bag can hit the same temperature rating, but the 800-fill version will be lighter and more compressible — and usually more expensive.
The trap to avoid is reading fill power as a warmth rating on its own. Fill power tells you the down's efficiency; the bag's actual warmth depends on the total amount of down stuffed in, which is why two bags with the same fill power can have very different temperature ratings. Use the ISO Comfort rating to judge warmth, and use fill power to judge how much weight and pack volume you are paying for to get there. For most people, 650–750 fill is the sweet spot of value; 800-plus fill is worth the premium mainly to dedicated gram-counters and cold-weather backpackers who care intensely about pack size. This efficiency-per-gram idea is the heart of the brand's whole metric, and you can put numbers on it with the warmth-to-weight comparator.
Mummy vs quilt
A mummy bag wraps all the way around with a hood, trapping the most heat — the cold-night choice. A quilt drops the crushed-flat underside and the hood to save weight, relying on your pad for the warmth underneath. That makes quilts a brilliant weight saver for warm-to-3-season trips, provided your pad's R-value is up to the job. When it's genuinely cold, the mummy's full coverage and hood win.
The logic behind the quilt follows straight from the bag-and-pad-system insight. If the fill underneath you is crushed flat and doing nothing anyway, why carry it? A quilt deletes that dead underside and the zipper, and often the hood, then attaches to your pad with straps so there is no cold gap underneath. The result is real weight and pack-size savings — but only if your pad's R-value is genuinely up to the season, because the pad is now doing all of the under-body warmth with no backup. A quilt on an under-insulated pad is the warm-bag-cold-pad mistake in its purest form. Quilts also suit restless and side sleepers who hate feeling wrapped up, since you can move freely and vent easily.
A mummy bag earns its extra weight when the temperature genuinely drops. The full wrap-around shape, the snug fit that limits dead air your body has to heat, the draft collar and the insulated hood — that is roughly a third of your heat loss the quilt either leaves to your pad or to a separate hat. On a cold or windy night, a sealed hood and draft collar make a bigger difference than people expect. My own kit splits along exactly this line: a down quilt is my 3-season weight-saving workhorse, and when it is genuinely cold I want the full coverage and hood of a mummy. Start with the trip's coldest night, not the gear fashion, and the choice usually makes itself.
The warmth-to-weight trade-off
Everything above feeds into the one number this site is named for: warmth to weight — the most warmth for the least carried grams. It is the backpacker's core metric because the two things pull against each other. Warmth costs weight (more fill, a higher R-value pad, a hood and draft collar), and shaving weight usually costs warmth. The whole skill is finding the balance for your trip rather than defaulting to either extreme: hauling a heavy four-season setup on a mild summer overnight, or going ultralight into a forecast you have no margin for.
The honest way to go light is to spend your weight where it actually buys warmth and cut it where it does not. High-fill-power down and a quilt save weight without giving up much warmth, because they trade away crushed, dead insulation rather than working insulation. A right-sized pad — long and wide enough, no more — and a warmth-boosting liner let you carry a slightly lighter bag and still hit your overnight low. That is "warmth where it counts, weight where it doesn't" in practice, and it is the exact balance that one freezing first night taught me to chase. The honest limit is this: go light by being smart about the system, never by under-rating the gear for the conditions, because the night the forecast is wrong is the night the margin matters. To see how candidate bags and pads stack up by this metric, put their rating and packed weight into the warmth-to-weight comparator.
Packed size and the rest of the fit
Two specs decide how a bag rides in your pack and they are easy to overlook until everything will not fit: packed size and weight. Packed size is the volume the bag takes once stuffed, and it matters as much as weight for a small pack — high-fill-power down packs to a fraction of the volume of synthetic or low-fill down, which is a big part of what you are paying for at the top end. Weight is self-explanatory, but compare the filled bag weight, since stuff sacks and features add up. A liner, the pad and the rest of the cart all have to share the same pack volume, so think about the system's total bulk, not just the bag's.
Fit matters too. A bag that is too long has a cold, empty footbox your body has to heat; one that is too short or too narrow compresses the insulation against you and creates cold spots, and feels claustrophobic on top of it. Most bags come in regular and long lengths, and many in a women's-specific cut with more insulation in the footbox and torso where colder sleepers need it. Side sleepers and people who toss and turn should look hard at quilts and roomier "spoon"-shaped bags. Getting the length and width right is a free upgrade — the same rating sleeps warmer in a bag that fits you.
The full sleep-system cart, in buying order
A bag is the first purchase, not the only one. Here's the whole sensible cart in the order that matters, so you spend on the warmth-defining pieces first and add the rest as you find you want them. The first two — the bag and the pad — are the system and decide whether you sleep warm; the liner is the highest-value add-on; the pillow, sack and groundsheet are comfort and protection.
- The bag or quilt — chosen on ISO Comfort rating, fill type and weight.
- The pad — chosen on R-value for the season; the other half of the warmth.
- A liner — a few degrees of extra warmth and it keeps the bag clean so the fill lasts.
- A pillow — real comfort for very little weight; a packable inflatable or a stuffable.
- A compression or stuff sack — controls pack volume, especially for down.
- A groundsheet — optional protection for the pad and tent floor.
Buy the bag and the pad together, as a matched pair, and resist the urge to economise on the pad to afford a warmer-rated bag — that is the exact trade that backfires. After those two, a sleeping bag liner is the cheapest warmth you can buy: it adds a few degrees, lets you carry a slightly lighter bag, and keeps body oils off the fill so the bag lasts longer. The pillow, compression sack and groundsheet are genuine quality-of-life pieces, but they do not change whether you sleep warm, so there is no rush to buy them on day one.
The rookie mistakes to skip
Almost every cold, sleepless first night traces back to the same short list. Avoid these and you are ahead of where I was for my first few seasons.
- Trusting the "rated to" number. That's usually the optimistic Limit rating. Buy to ISO Comfort and add margin.
- Ignoring R-value. The cold pad ruins more nights than a thin bag does. Match the pad to the season.
- Running a summer pad on cold ground. A low-R pad under a warm bag still sleeps cold.
- Pairing a quilt with a too-thin pad. A quilt leaves all the under-body warmth to the pad — under-rate the pad and the quilt cannot save the night.
- Reading fill power as a warmth rating. Fill power is down quality, not warmth; judge warmth by the ISO Comfort rating.
- Buying heavy "just in case". Match the system to the trip; carry warmth where it counts, not everywhere.
- Treating ratings as a safety guarantee. See the note below — ratings are lab figures, not promises.
The thread through all of them is the same: read the bag and the pad as one system, trust the Comfort rating and the R-value over the headline marketing number, and size both to the coldest night you will actually sleep on rather than the average. The sleep-system matcher is built to make that one decision for you, and the by temperature & season hub works the pairings through season by season.
Frequently asked questions
What is the most important thing in a backpacking sleep system?
That warmth comes from the bag AND the pad as one system. A warm bag on a cold, low-R-value pad still sleeps cold, because lying down crushes the bag's underside and the cold ground pulls heat straight out of you. Size the bag's ISO Comfort rating and the pad's R-value to the same overnight low.
Should I buy to the Comfort rating or the Limit rating?
Buy to the ISO 23537 Comfort rating. The Limit rating assumes a warm sleeper on the edge of shivering and is optimistic for most people. Cold sleepers and women in particular should shop to Comfort. Ratings are lab figures and real-world warmth varies — they are a guide, never a survival guarantee.
What R-value sleeping pad do I need?
As a rough guide, R-2 and under suits warm summer nights, R-2 to R-4 covers most 3-season trips, and R-4.5+ is for cold-weather and winter ground. R-value is an ASTM F3340 lab figure; real-world warmth varies with the sleeper, the bag, the shelter and the conditions.
Down or synthetic fill?
Down packs smaller, weighs less and lasts longer for the same warmth, which is why it dominates ultralight kits. Synthetic keeps more of its warmth when damp and costs less, making it the safer pick for wet shoulder-season trips. It is a trade-off between weight and wet-weather reliability.
Mummy bag or quilt?
A mummy bag wraps fully around with a hood, so it is warmer in the cold. A quilt drops the crushed-flat underside and the hood to save weight, relying on your pad for the underside warmth. Quilts shine for warm-to-3-season ultralight use; mummies win when it is genuinely cold.
Is a temperature rating a guarantee I will stay warm?
No. ISO 23537 ratings and ASTM F3340 R-values are lab figures and a useful way to compare gear. Real-world warmth varies with the sleeper, the pad, the shelter and the conditions, and no rating is a survival guarantee. For cold or high-altitude trips, build in margin and buy to the Comfort rating.
Where to go next
The four silos, each starting from a beginner-first hub.